
揭秘前端设计模式(下)
在上一讲中,我们介绍了设计模式的一些基本概念。本讲我们来结合实例,结合前端开发,继续讲解这个话题。
回顾一下设计模式的内容:
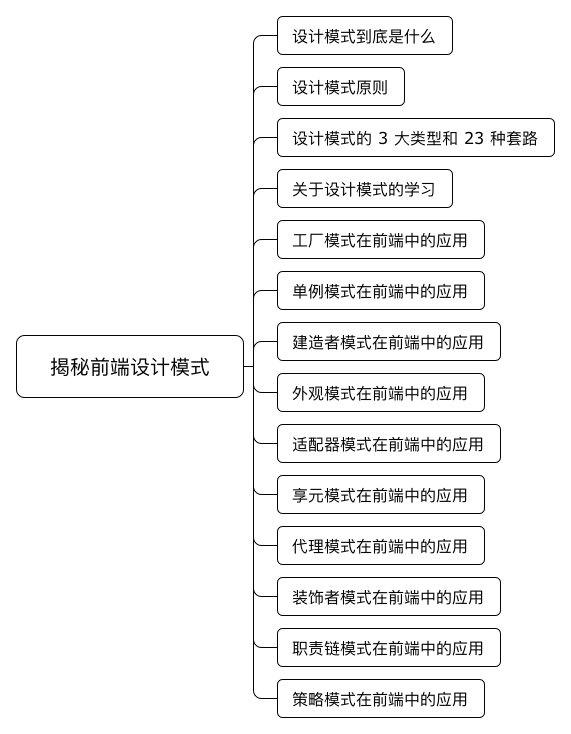
工厂模式在前端中的应用
创建型的工厂模式一共分为三种:
- 简单工厂模式(Simple Factory)
- 工厂方法模式(Factory Method)
- 抽象工厂模式(Abstract Factory)
顾名思义,工厂模式就是隐藏了创建一个实例的复杂度,只需要提供一个简单的接口调用,直接完成创建实例的目的。而这三种工厂模式的区别我认为没有太大必要去细分,重点还是在于应用。比如一个非常常见的场景,就是 jQuery 的选择器:
class jQuery {
    constructor(selector) {
        super(selector)
    }
    //  ....
}

window.$ = function(selector) {
    return new jQuery(selector)
}
class jQuery {
constructor(selector) {
super(selector)
}
// ....
}
window.$ = function(selector) {
return new jQuery(selector)
}这样的代码非常明显,我们需要构建一个 jQuery 实例时,只需要:
$('selector')$('selector')因为 $ 已经被挂载在 window 上,而 $ 作为一个函数,它直接返回了 new jQuery(selector),开发者不需要再麻烦地使用 new $('selector') 方式。
除了 jQuery 以外,React 开发者常用的 React.createElement 也是工厂模式的体现:
React.createElement('span', null, 'Factory Pattern!'),React.createElement('span', null, 'Factory Pattern!'),只要具有组件化思想的类库或者框架,无一例外都会使用工厂模式去创建组件实例,除了提到的 React、jQuery(jQuery UI) 以外,Vue,甚至是更古老的 ExtJS 都不例外。
我们再来看一个例子,请读者体会:
class Car {
  constructor(options) {
    const {doors = 4, state = 'new', color = 'black'} = options
    this.doors = doors
    this.state = state
    this.color = color
  }
}

class Truck {
  constructor(options) {
    const {wheelSize = 'medium', state = 'used', color = 'silver'} = options
    this.wheelSize = wheelSize
    this.state = state
    this.color = color
  }
}


class VehicleFactory {
  createVehicle(options) {
    switch (options.type) {
      case 'car':
        this.vehicleTarget = Car
        break;
      case 'truck':
        this.vehicleTarget = Truck
        break;
      default:
        this.vehicleTarget = Car
        break;
    }

    return new this.vehicleTarget(options)
  }
}

let factory = new VehicleFactory()

let instance1 = factory.createVehicle({
  type: 'car',
  color: 'yellow',
  doors: 4
})

let instance2 = factory.createVehicle({
  type: 'truck',
  state: 'new',
  wheelSize: 'small'
})
class Car {
constructor(options) {
const {doors = 4, state = 'new', color = 'black'} = options
this.doors = doors
this.state = state
this.color = color
}
}
class Truck {
constructor(options) {
const {wheelSize = 'medium', state = 'used', color = 'silver'} = options
this.wheelSize = wheelSize
this.state = state
this.color = color
}
}
class VehicleFactory {
createVehicle(options) {
switch (options.type) {
case 'car':
this.vehicleTarget = Car
break;
case 'truck':
this.vehicleTarget = Truck
break;
default:
this.vehicleTarget = Car
break;
}
return new this.vehicleTarget(options)
}
}
let factory = new VehicleFactory()
let instance1 = factory.createVehicle({
type: 'car',
color: 'yellow',
doors: 4
})
let instance2 = factory.createVehicle({
type: 'truck',
state: 'new',
wheelSize: 'small'
})尝试:
instance1 instanceof Car
instance2 instanceof Truck
instance1 instanceof Car
instance2 instanceof Truck都会返回 true。理解了这个例子,其实你也就明白了建造者模式。“什么?我还不知道建造者模式是什么!”,没错,设计模式就是这样,重要的不是死记硬背每种模式的概念,而是在实际中应用,其实不经意之间,你一直在使用设计模式。
单例模式在前端中的应用
单例模式非常简单,通俗来说就是某个类只能有一个是实例。那么他的应用场景也就非常直观:引用第三方库,全局唯一的对象或者状态管理,全局唯一的插件等。在之前的课程中,我们通过闭包实现了单例模式,这里再次用 ES6 实现:
class Singleton {
  constructor() {
    if (!Singleton.instance) {
      Singleton.instance = this;
    }

    return Singleton.instance;
  }
}
class Singleton {
constructor() {
if (!Singleton.instance) {
Singleton.instance = this;
}
return Singleton.instance;
}
}建造者模式在前端中的应用
前面我们提到了建造者模式,这里再深入地进行了解。建造者的精髓在于“分步骤分情况构建一个复杂的对象”。比如我们想实现一个 pizza 类,用于生成 pizza 实例:
class Pizza {
    constructor(size, chesse = true, tomato = false, lettuce = false) {
    }
}
class Pizza {
constructor(size, chesse = true, tomato = false, lettuce = false) {
}
}构建一个 pizza 需要在初始化时传入需要的参数,如果这个 pizza 类变得复杂,比如需要声明是否添加 mushroom、oliver、poulet 等,那么参数就会非常失控:
class Pizza {
    constructor(size, mushroom = true, oliver= true, poulet = false, chesse = true, tomato = false, lettuce = false) {
    }
}
class Pizza {
constructor(size, mushroom = true, oliver= true, poulet = false, chesse = true, tomato = false, lettuce = false) {
}
}使用建造者模式:
class Pizza {
    constructor(size) {
        this.size = size
    }

    addMushroom() {
        this.mushroom = true
        return this
    }

    addOliver() {
        this.oliver = true
        return this
    }

    addPoulet() {
        this.poulet = true
        return this
    }

    addChesse() {
        this.chesse = true
        return this
    }

    addTomato() {
        this.tomato = true
        return this
    }

    addLettuce() {
        this.lettuce = true
        return this
    }

    build() {
        return new Pizza(this)
    }
}
class Pizza {
constructor(size) {
this.size = size
}
addMushroom() {
this.mushroom = true
return this
}
addOliver() {
this.oliver = true
return this
}
addPoulet() {
this.poulet = true
return this
}
addChesse() {
this.chesse = true
return this
}
addTomato() {
this.tomato = true
return this
}
addLettuce() {
this.lettuce = true
return this
}
build() {
return new Pizza(this)
}
}当然,你可以认为参数以对象的形式传入,就能解决参数过多以及参数顺序问题。可是往往构造一个对象并不只是参数的问题。比如构建一个复杂的 DOM 结构,而针对于此 jQuery 利用建造者模式简化了构建 DOM 的过程:
我们可以通过多种方式构造 DOM :
$( "<div class= "foo">bar</div>" );

$( "<p id="test">foo <em>bar</em></p>").appendTo("body" );

var newParagraph = $( "<p />" ).text( "Hello world" );

$( "<input />" )
      .attr({ "type": "text", "id":"sample"});
.appendTo("#container");$( "<div class= "foo">bar</div>" );
$( "<p id="test">foo <em>bar</em></p>").appendTo("body" );
var newParagraph = $( "<p />" ).text( "Hello world" );
$( "<input />" )
.attr({ "type": "text", "id":"sample"});
.appendTo("#container");对应 jQuery.prototype 源码:
  // HANDLE: $(html) -> $(array)
    if ( match[1] ) {
      context = context instanceof jQuery ? context[0] : context;
      doc = ( context ? context.ownerDocument || context : document );

      //如果传入的是单个字符串,并且是单个标记
      //只需执行 createElement 并跳过其余部分

      ret = rsingleTag.exec( selector );

      if ( ret ) {
        if ( jQuery.isPlainObject( context ) ) {
          selector = [ document.createElement( ret[1] ) ];
          jQuery.fn.attr.call( selector, context, true );

        } else {
          selector = [ doc.createElement( ret[1] ) ];
        }

      } else {
        ret = jQuery.buildFragment( [ match[1] ], [ doc ] );
        selector = ( ret.cacheable ? jQuery.clone(ret.fragment)
        : ret.fragment ).childNodes;
      }

      return jQuery.merge( this, selector );
// HANDLE: $(html) -> $(array)
if ( match[1] ) {
context = context instanceof jQuery ? context[0] : context;
doc = ( context ? context.ownerDocument || context : document );
//如果传入的是单个字符串,并且是单个标记
//只需执行 createElement 并跳过其余部分
ret = rsingleTag.exec( selector );
if ( ret ) {
if ( jQuery.isPlainObject( context ) ) {
selector = [ document.createElement( ret[1] ) ];
jQuery.fn.attr.call( selector, context, true );
} else {
selector = [ doc.createElement( ret[1] ) ];
}
} else {
ret = jQuery.buildFragment( [ match[1] ], [ doc ] );
selector = ( ret.cacheable ? jQuery.clone(ret.fragment)
: ret.fragment ).childNodes;
}
return jQuery.merge( this, selector );外观模式在前端中的应用
外观模式的精髓在于对接口进行二次封装,隐藏其内部的复杂度。这种设计在前端开发中也非常常见,比如跨浏览器兼容性的封装,比如事件:
var addMyEvent = function( el,ev,fn ){
  if( el.addEventListener ){//存在 DOM2 级方法,则使用并传入事件类型、事件处理程序函数和第3个参数 false(表示冒泡阶段)
        el.addEventListener( ev,fn, false );
  }else if(el.attachEvent){ // 为兼容 IE8 及更早浏览器,注意事件类型必须加上"on"前缀
        el.attachEvent( "on" + ev, fn );
  }else{
       el["on" + ev] = fn;//其他方法都无效,默认采用 DOM0 级方法,使用方括号语法将属性名指定为事件处理程序
    }
};
var addMyEvent = function( el,ev,fn ){
if( el.addEventListener ){//存在 DOM2 级方法,则使用并传入事件类型、事件处理程序函数和第3个参数 false(表示冒泡阶段)
el.addEventListener( ev,fn, false );
}else if(el.attachEvent){ // 为兼容 IE8 及更早浏览器,注意事件类型必须加上"on"前缀
el.attachEvent( "on" + ev, fn );
}else{
el["on" + ev] = fn;//其他方法都无效,默认采用 DOM0 级方法,使用方括号语法将属性名指定为事件处理程序
}
};再比如 $(document).ready 的用法:
bindReady: function() {
    ...
    if ( document.addEventListener ) {
      // Use the handy event callback
      document.addEventListener( "DOMContentLoaded", DOMContentLoaded, false );

      // A fallback to window.onload, that will always work
      window.addEventListener( "load", jQuery.ready, false );

    // If IE event model is used
    } else if ( document.attachEvent ) {

      document.attachEvent( "onreadystatechange", DOMContentLoaded );

      // A fallback to window.onload, that will always work
window.attachEvent( "onload", jQuery.ready );bindReady: function() {
...
if ( document.addEventListener ) {
// Use the handy event callback
document.addEventListener( "DOMContentLoaded", DOMContentLoaded, false );
// A fallback to window.onload, that will always work
window.addEventListener( "load", jQuery.ready, false );
// If IE event model is used
} else if ( document.attachEvent ) {
document.attachEvent( "onreadystatechange", DOMContentLoaded );
// A fallback to window.onload, that will always work
window.attachEvent( "onload", jQuery.ready );再看一个例子,外观模式和模块化的结合:
var module = (function() {
    var _private = {
        i: 5,
        get: function() {
            console.log( "current value:" + this.i);
        },
        set: function( val ) {
            this.i = val;
        },
        run: function() {
            console.log( "running" );
        },
        jump: function(){
            console.log( "jumping" );
        }
    };

    return {
        facade: function( args ) {
            _private.set(args.val);
            _private.get();
            if ( args.run ) {
                _private.run();
            }
        }
    };
}());


// Outputs: "current value: 10" and "running"
module.facade( {run: true, val: 10} );
var module = (function() {
var _private = {
i: 5,
get: function() {
console.log( "current value:" + this.i);
},
set: function( val ) {
this.i = val;
},
run: function() {
console.log( "running" );
},
jump: function(){
console.log( "jumping" );
}
};
return {
facade: function( args ) {
_private.set(args.val);
_private.get();
if ( args.run ) {
_private.run();
}
}
};
}());
// Outputs: "current value: 10" and "running"
module.facade( {run: true, val: 10} );在这个例子中,开发者只需要调用 module.facade( {run: true, val: 10} ),调用后会触发模块当中私有方法,实现对数值的改写,我们并不需要明白 module 内部实现,只需要关心其封装即可。
适配器模式在前端中的应用
适配器模式在于适配两个及以上类接口不兼容的问题,和外观模式的核心思路类似。在 jQuery 中也广泛应用,我们知道 opacity 属性在不同浏览器中的表现方式不同。
在 Chrome 4+、FF2+、Saf3.1+、Opera 9+、IE9、iOS 3.2+、Android 2.1+ 中:
opacity: 0.9opacity: 0.9是常见用法,但是在 IE6-8,却是:
filter: alpha(opacity=90)filter: alpha(opacity=90)jQuery 利用适配器模式,对这种差异进行了抹平:
// 读
$( ".container" ).css( { opacity: .5 } );

// 取
let opacity = $( ".container" ).css( { opacity: .5 } );
// 读
$( ".container" ).css( { opacity: .5 } );
// 取
let opacity = $( ".container" ).css( { opacity: .5 } );其内部实现为:
get: function( elem, computed ) {
  // IE uses filters for opacity
  return ropacity.test( (
        computed && elem.currentStyle ?
            elem.currentStyle.filter : elem.style.filter) || "" ) ?
    ( parseFloat( RegExp.$1 ) / 100 ) + "" :
    computed ? "1" : "";
},

set: function( elem, value ) {
  var style = elem.style,
    currentStyle = elem.currentStyle,
    opacity = jQuery.isNumeric( value ) ?
          "alpha(opacity=" + value * 100 + ")" : "",
    filter = currentStyle && currentStyle.filter || style.filter || "";

  // IE has trouble with opacity if it does not have layout
  // Force it by setting the zoom level
  style.zoom = 1;

  // if setting opacity to 1, and no other filters
  //exist - attempt to remove filter attribute #6652
  if ( value >= 1 && jQuery.trim( filter.replace( ralpha, "" ) ) === "" ) {

    // Setting style.filter to null, "" & " " still leave
    // "filter:" in the cssText if "filter:" is present at all,
    // clearType is disabled, we want to avoid this style.removeAttribute
    // is IE Only, but so apparently is this code path...
    style.removeAttribute( "filter" );

    // if there there is no filter style applied in a css rule, we are done
    if ( currentStyle && !currentStyle.filter ) {
      return;
    }
  }

  // otherwise, set new filter values
  style.filter = ralpha.test( filter ) ?
    filter.replace( ralpha, opacity ) :
    filter + " " + opacity;
}
};get: function( elem, computed ) {
// IE uses filters for opacity
return ropacity.test( (
computed && elem.currentStyle ?
elem.currentStyle.filter : elem.style.filter) || "" ) ?
( parseFloat( RegExp.$1 ) / 100 ) + "" :
computed ? "1" : "";
},
set: function( elem, value ) {
var style = elem.style,
currentStyle = elem.currentStyle,
opacity = jQuery.isNumeric( value ) ?
"alpha(opacity=" + value * 100 + ")" : "",
filter = currentStyle && currentStyle.filter || style.filter || "";
// IE has trouble with opacity if it does not have layout
// Force it by setting the zoom level
style.zoom = 1;
// if setting opacity to 1, and no other filters
//exist - attempt to remove filter attribute #6652
if ( value >= 1 && jQuery.trim( filter.replace( ralpha, "" ) ) === "" ) {
// Setting style.filter to null, "" & " " still leave
// "filter:" in the cssText if "filter:" is present at all,
// clearType is disabled, we want to avoid this style.removeAttribute
// is IE Only, but so apparently is this code path...
style.removeAttribute( "filter" );
// if there there is no filter style applied in a css rule, we are done
if ( currentStyle && !currentStyle.filter ) {
return;
}
}
// otherwise, set new filter values
style.filter = ralpha.test( filter ) ?
filter.replace( ralpha, opacity ) :
filter + " " + opacity;
}
};享元模式在前端中的应用
我个人认为享元模式非常重要,他是用于性能优化的一种常见模式。它依靠:
- 主减少创建对象实例的数量
- 运用共享技术来有效支持大量细粒度的对象
这两种方式减少内存占用,以提高性能。在 JavaScript 中,浏览器特别是移动端的浏览器所占有的内存并不算多,因此合理利用享元模式,达到节省内存的目的,就成了一件非常有意义的优化。
在 Java 中有一个关键字:implements,它用于接入接口 interfaces,这在 JavaScript 语言中并不存在,但是我们仍然可以模拟一个:
Function.prototype.implementsFor = function( parentClassOrObject ){
    if ( parentClassOrObject.constructor === Function )
    {
        // Normal Inheritance
        this.prototype = new parentClassOrObject();
        this.prototype.constructor = this;
        this.prototype.parent = parentClassOrObject.prototype;
    }
    else
    {
        // Pure Virtual Inheritance
        this.prototype = parentClassOrObject;
        this.prototype.constructor = this;
        this.prototype.parent = parentClassOrObject;
    }
    return this;
};Function.prototype.implementsFor = function( parentClassOrObject ){
if ( parentClassOrObject.constructor === Function )
{
// Normal Inheritance
this.prototype = new parentClassOrObject();
this.prototype.constructor = this;
this.prototype.parent = parentClassOrObject.prototype;
}
else
{
// Pure Virtual Inheritance
this.prototype = parentClassOrObject;
this.prototype.constructor = this;
this.prototype.parent = parentClassOrObject;
}
return this;
};我们看:implementsFor 作用于一个构造函数,它接受一个父类(function)或者一个 object,并继承该父类构造函数(function)或者指定的 object。上段代码并不难理解,我们看一个应用实例:
// Flyweight object
var CoffeeOrder = {

  // Interfaces
  serveCoffee:function(context){},
    getFlavor:function(){}

};


// ConcreteFlyweight object that creates ConcreteFlyweight
// Implements CoffeeOrder
function CoffeeFlavor( newFlavor ){

    var flavor = newFlavor;

    // If an interface has been defined for a feature
    // implement the feature
    if( typeof this.getFlavor === "function" ){
      this.getFlavor = function() {
          return flavor;
      };
    }

    if( typeof this.serveCoffee === "function" ){
      this.serveCoffee = function( context ) {
        console.log("Serving Coffee flavor "
          + flavor
          + " to table number "
          + context.getTable());
      };
    }

}


// Implement interface for CoffeeOrder
CoffeeFlavor.implementsFor( CoffeeOrder );


// Handle table numbers for a coffee order
function CoffeeOrderContext( tableNumber ) {
   return{
      getTable: function() {
         return tableNumber;
     }
   };
}

function CoffeeFlavorFactory() {
    var flavors = {},
    length = 0;

    return {
        getCoffeeFlavor: function (flavorName) {

            var flavor = flavors[flavorName];
            if (typeof flavor === "undefined") {
                flavor = new CoffeeFlavor(flavorName);
                flavors[flavorName] = flavor;
                length++;
            }
            return flavor;
        },

        getTotalCoffeeFlavorsMade: function () {
            return length;
        }
    };
}

// Sample usage:
// testFlyweight()

function testFlyweight(){


  // The flavors ordered.
  var flavors = [],

  // The tables for the orders.
    tables = [],

  // Number of orders made
    ordersMade = 0,

  // The CoffeeFlavorFactory instance
    flavorFactory = new CoffeeFlavorFactory();

  function takeOrders( flavorIn, table) {
     flavors.push( flavorFactory.getCoffeeFlavor( flavorIn ) );
     tables.push( new CoffeeOrderContext( table ) );
     ordersMade++;
  }

   takeOrders("Cappuccino", 2);
   takeOrders("Cappuccino", 2);
   takeOrders("Frappe", 1);
   takeOrders("Frappe", 1);
   takeOrders("Xpresso", 1);
   takeOrders("Frappe", 897);
   takeOrders("Cappuccino", 97);
   takeOrders("Cappuccino", 97);
   takeOrders("Frappe", 3);
   takeOrders("Xpresso", 3);
   takeOrders("Cappuccino", 3);
   takeOrders("Xpresso", 96);
   takeOrders("Frappe", 552);
   takeOrders("Cappuccino", 121);
   takeOrders("Xpresso", 121);

   for (var i = 0; i < ordersMade; ++i) {
       flavors[i].serveCoffee(tables[i]);
   }
   console.log(" ");
   console.log("total CoffeeFlavor objects made: " + flavorFactory.getTotalCoffeeFlavorsMade());
}
// Flyweight object
var CoffeeOrder = {
// Interfaces
serveCoffee:function(context){},
getFlavor:function(){}
};
// ConcreteFlyweight object that creates ConcreteFlyweight
// Implements CoffeeOrder
function CoffeeFlavor( newFlavor ){
var flavor = newFlavor;
// If an interface has been defined for a feature
// implement the feature
if( typeof this.getFlavor === "function" ){
this.getFlavor = function() {
return flavor;
};
}
if( typeof this.serveCoffee === "function" ){
this.serveCoffee = function( context ) {
console.log("Serving Coffee flavor "
+ flavor
+ " to table number "
+ context.getTable());
};
}
}
// Implement interface for CoffeeOrder
CoffeeFlavor.implementsFor( CoffeeOrder );
// Handle table numbers for a coffee order
function CoffeeOrderContext( tableNumber ) {
return{
getTable: function() {
return tableNumber;
}
};
}
function CoffeeFlavorFactory() {
var flavors = {},
length = 0;
return {
getCoffeeFlavor: function (flavorName) {
var flavor = flavors[flavorName];
if (typeof flavor === "undefined") {
flavor = new CoffeeFlavor(flavorName);
flavors[flavorName] = flavor;
length++;
}
return flavor;
},
getTotalCoffeeFlavorsMade: function () {
return length;
}
};
}
// Sample usage:
// testFlyweight()
function testFlyweight(){
// The flavors ordered.
var flavors = [],
// The tables for the orders.
tables = [],
// Number of orders made
ordersMade = 0,
// The CoffeeFlavorFactory instance
flavorFactory = new CoffeeFlavorFactory();
function takeOrders( flavorIn, table) {
flavors.push( flavorFactory.getCoffeeFlavor( flavorIn ) );
tables.push( new CoffeeOrderContext( table ) );
ordersMade++;
}
takeOrders("Cappuccino", 2);
takeOrders("Cappuccino", 2);
takeOrders("Frappe", 1);
takeOrders("Frappe", 1);
takeOrders("Xpresso", 1);
takeOrders("Frappe", 897);
takeOrders("Cappuccino", 97);
takeOrders("Cappuccino", 97);
takeOrders("Frappe", 3);
takeOrders("Xpresso", 3);
takeOrders("Cappuccino", 3);
takeOrders("Xpresso", 96);
takeOrders("Frappe", 552);
takeOrders("Cappuccino", 121);
takeOrders("Xpresso", 121);
for (var i = 0; i < ordersMade; ++i) {
flavors[i].serveCoffee(tables[i]);
}
console.log(" ");
console.log("total CoffeeFlavor objects made: " + flavorFactory.getTotalCoffeeFlavorsMade());
}这个例子中,CoffeeFlavor 接入了 CoffeeOrder 的接口。接口的概念也许对于传统的 JavaScript 开发者有些陌生,我们再来看一个更加具有表现力的例子:在图书管理系统中,每本书都有以下特性:
- ID
- Title
- Author
- Genre
- Page count
- Publisher ID
- ISBN
同时我们需要以下属性来追踪每一本书时,记录它是否可用、归还时间等:
- checkoutDate
- checkoutMember
- dueReturnDate
- availability
那么 Book 这个类看上去就像:
var Book = function( id, title, author, genre, pageCount,publisherID, ISBN, checkoutDate, checkoutMember, dueReturnDate,availability ){

   this.id = id;
   this.title = title;
   this.author = author;
   this.genre = genre;
   this.pageCount = pageCount;
   this.publisherID = publisherID;
   this.ISBN = ISBN;
   this.checkoutDate = checkoutDate;
   this.checkoutMember = checkoutMember;
   this.dueReturnDate = dueReturnDate;
   this.availability = availability;

};

Book.prototype = {

  getTitle: function () {
     return this.title;
  },

  getAuthor: function () {
     return this.author;
  },

  getISBN: function (){
     return this.ISBN;
  },

  // For brevity, other getters are not shown
  updateCheckoutStatus: function( bookID, newStatus, checkoutDate, checkoutMember, newReturnDate ){

     this.id = bookID;
     this.availability = newStatus;
     this.checkoutDate = checkoutDate;
     this.checkoutMember = checkoutMember;
     this.dueReturnDate = newReturnDate;

  },

  extendCheckoutPeriod: function( bookID, newReturnDate ){

      this.id = bookID;
      this.dueReturnDate = newReturnDate;

  },

  isPastDue: function(bookID){

     var currentDate = new Date();
     return currentDate.getTime() > Date.parse( this.dueReturnDate );

   }
};
var Book = function( id, title, author, genre, pageCount,publisherID, ISBN, checkoutDate, checkoutMember, dueReturnDate,availability ){
this.id = id;
this.title = title;
this.author = author;
this.genre = genre;
this.pageCount = pageCount;
this.publisherID = publisherID;
this.ISBN = ISBN;
this.checkoutDate = checkoutDate;
this.checkoutMember = checkoutMember;
this.dueReturnDate = dueReturnDate;
this.availability = availability;
};
Book.prototype = {
getTitle: function () {
return this.title;
},
getAuthor: function () {
return this.author;
},
getISBN: function (){
return this.ISBN;
},
// For brevity, other getters are not shown
updateCheckoutStatus: function( bookID, newStatus, checkoutDate, checkoutMember, newReturnDate ){
this.id = bookID;
this.availability = newStatus;
this.checkoutDate = checkoutDate;
this.checkoutMember = checkoutMember;
this.dueReturnDate = newReturnDate;
},
extendCheckoutPeriod: function( bookID, newReturnDate ){
this.id = bookID;
this.dueReturnDate = newReturnDate;
},
isPastDue: function(bookID){
var currentDate = new Date();
return currentDate.getTime() > Date.parse( this.dueReturnDate );
}
};这么看上去并没有什么问题,但是当图书增多时,对于系统的压力会逐渐增多。为此我们将书的属性分为两种:本身固有的和外在特性。本身固有的属性包括 title、author 等,外在特性包括 checkoutMember、dueReturnDate 等。这样一来,我们简化书的构造函数为:
var Book = function ( title, author, genre, pageCount, publisherID, ISBN ) {

    this.title = title;
    this.author = author;
    this.genre = genre;
    this.pageCount = pageCount;
    this.publisherID = publisherID;
    this.ISBN = ISBN;

};
var Book = function ( title, author, genre, pageCount, publisherID, ISBN ) {
this.title = title;
this.author = author;
this.genre = genre;
this.pageCount = pageCount;
this.publisherID = publisherID;
this.ISBN = ISBN;
};我们将外在特性删去,check-outs 等信息将会被移动到一个新的类中,一个新的工厂函数也将出现:
// Book Factory singleton
var BookFactory = (function () {
  var existingBooks = {}, existingBook;

  return {
    createBook: function ( title, author, genre, pageCount, publisherID, ISBN ) {

      // Find out if a particular book meta-data combination has been created before
      // !! or (bang bang) forces a boolean to be returned
      existingBook = existingBooks[ISBN];
      if ( !!existingBook ) {
        return existingBook;
      } else {

        // if not, let's create a new instance of the book and store it
        var book = new Book( title, author, genre, pageCount, publisherID, ISBN );
        existingBooks[ISBN] = book;
        return book;

      }
    }
  };

})();
// Book Factory singleton
var BookFactory = (function () {
var existingBooks = {}, existingBook;
return {
createBook: function ( title, author, genre, pageCount, publisherID, ISBN ) {
// Find out if a particular book meta-data combination has been created before
// !! or (bang bang) forces a boolean to be returned
existingBook = existingBooks[ISBN];
if ( !!existingBook ) {
return existingBook;
} else {
// if not, let's create a new instance of the book and store it
var book = new Book( title, author, genre, pageCount, publisherID, ISBN );
existingBooks[ISBN] = book;
return book;
}
}
};
})();在这个工厂函数中,我们将会检查当前需要创建的书籍是否已经存在,如果存在直接返回书实例;否则进行调用 Book 构造函数进行创建。这保证了所有的书都是唯一的,而不存在重复。
对于书的外在特性,我们创建 BookRecordManager 来维护每一本书的状态,并通过 bookId 与每一个本书进行关系创建:
var BookRecordManager = (function () {

  var bookRecordDatabase = {};

  return {
    // add a new book into the library system
    addBookRecord: function ( id, title, author, genre, pageCount, publisherID, ISBN, checkoutDate, checkoutMember, dueReturnDate, availability ) {

      var book = BookFactory.createBook( title, author, genre, pageCount, publisherID, ISBN );

      bookRecordDatabase[id] = {
        checkoutMember: checkoutMember,
        checkoutDate: checkoutDate,
        dueReturnDate: dueReturnDate,
        availability: availability,
        book: book
      };
    },
    updateCheckoutStatus: function ( bookID, newStatus, checkoutDate, checkoutMember, newReturnDate ) {

      var record = bookRecordDatabase[bookID];
      record.availability = newStatus;
      record.checkoutDate = checkoutDate;
      record.checkoutMember = checkoutMember;
      record.dueReturnDate = newReturnDate;
    },

    extendCheckoutPeriod: function ( bookID, newReturnDate ) {
      bookRecordDatabase[bookID].dueReturnDate = newReturnDate;
    },

    isPastDue: function ( bookID ) {
      var currentDate = new Date();
      return currentDate.getTime() > Date.parse( bookRecordDatabase[bookID].dueReturnDate );
    }
  };

})();
var BookRecordManager = (function () {
var bookRecordDatabase = {};
return {
// add a new book into the library system
addBookRecord: function ( id, title, author, genre, pageCount, publisherID, ISBN, checkoutDate, checkoutMember, dueReturnDate, availability ) {
var book = BookFactory.createBook( title, author, genre, pageCount, publisherID, ISBN );
bookRecordDatabase[id] = {
checkoutMember: checkoutMember,
checkoutDate: checkoutDate,
dueReturnDate: dueReturnDate,
availability: availability,
book: book
};
},
updateCheckoutStatus: function ( bookID, newStatus, checkoutDate, checkoutMember, newReturnDate ) {
var record = bookRecordDatabase[bookID];
record.availability = newStatus;
record.checkoutDate = checkoutDate;
record.checkoutMember = checkoutMember;
record.dueReturnDate = newReturnDate;
},
extendCheckoutPeriod: function ( bookID, newReturnDate ) {
bookRecordDatabase[bookID].dueReturnDate = newReturnDate;
},
isPastDue: function ( bookID ) {
var currentDate = new Date();
return currentDate.getTime() > Date.parse( bookRecordDatabase[bookID].dueReturnDate );
}
};
})();其实变动也比较明显,书目所有的外在特性都被从书本身的特性中抽离,现在被移动到 BookManager 的 BookDatabase 当中。对于书借入/借出的操作也移动到了 BookRecordManager 当中,因为这些方法需要直接操作书的外在特性。如此一来,比一本书拥有多项属性的大 object 模式更加高效,也更利于维护。
关于性能可以具体来看:如果有 30 本同样一本书的 copy,现有的模式下只存储了一个实例;同时对于书状态转移的函数,我们维护在 BookManager 当中,而不再出现在对象(原型)上,如果这些函数出现在每一个书实例当中,将会是更大的开销。
享元模式在前端还有更多的应用,比如事件代理就是一个很典型的体现:
<div id="container">
    <div class="toggle" href="#">More Info(Address)
        <span class="info">
            This is more information
        </span>
    </div>
    <div class="toggle" href="#">Even More Info(Map)
        <span class="info">
            <iframe src=""></iframe>
        </span>
    </div>
</div><div id="container">
<div class="toggle" href="#">More Info(Address)
<span class="info">
This is more information
</span>
</div>
<div class="toggle" href="#">Even More Info(Map)
<span class="info">
<iframe src=""></iframe>
</span>
</div>
</div>我们集中将事件处理放到父容器上
var stateManager = {

  fly: function () {

    var self = this;

    $( "#container" )
          .unbind()
          .on( "click", "div.toggle", function ( e ) {
            self.handleClick( e.target );
          });
  },

  handleClick: function ( elem ) {
    $( elem ).find( "span" ).toggle( "slow" );
  }
};
var stateManager = {
fly: function () {
var self = this;
$( "#container" )
.unbind()
.on( "click", "div.toggle", function ( e ) {
self.handleClick( e.target );
});
},
handleClick: function ( elem ) {
$( elem ).find( "span" ).toggle( "slow" );
}
};如此类似,前面课程提到过的 React 合成事件的池化机制,都体现了异曲同工之妙。
代理模式在前端中的应用
代理模式大家应该都不陌生,ES next 提供的 Proxy 让我们实现代理模式变得更加容易。关于 Proxy 的使用这些基础内容这里不过多赘述,直接来看一些代理模式的应用场景。
我们对函数进行代理,对函数的返回结果进行缓存。在函数执行时,优先使用缓存值,否则返回执行计算值:
const getCacheProxy = (fn, cache = new Map()) =>
  new Proxy(fn, {
    apply(target, context, args) {
      const argsString = args.join(' ')
      if (cache.has(argsString)) {
        return cache.get(argsString)
      }
      const result = fn(...args)
      cache.set(argsString, result)

      return result
    }
  })
const getCacheProxy = (fn, cache = new Map()) =>
new Proxy(fn, {
apply(target, context, args) {
const argsString = args.join(' ')
if (cache.has(argsString)) {
return cache.get(argsString)
}
const result = fn(...args)
cache.set(argsString, result)
return result
}
})另外一个类似的实现:
const createThrottleProxy = (fn, timer) => {
  let last = Date.now() - timer
  return new Proxy(fn, {
    apply(target, context, args) {
      if (Date.now() - last >= rate) {
        fn(args)
        last = Date.now()
      }
    }
  })
};
const createThrottleProxy = (fn, timer) => {
let last = Date.now() - timer
return new Proxy(fn, {
apply(target, context, args) {
if (Date.now() - last >= rate) {
fn(args)
last = Date.now()
}
}
})
};这些内容在前面的课程都有渗透,相信读者已经不难理解了。我们再来看 jQuery 当中的例子:
$( "button" ).on( "click", function () {
  // Within this function, "this" refers to the element that was clicked
  $( this ).addClass( "active" );
});$( "button" ).on( "click", function () {
// Within this function, "this" refers to the element that was clicked
$( this ).addClass( "active" );
});通过 $( this ) 可以获取到当前触发事件的元素,但是:
$( "button" ).on( "click", function () {
  setTimeout(function () {
    // "this" doesn't refer to our element!
    $( this ).addClass( "active" );
  });
});$( "button" ).on( "click", function () {
setTimeout(function () {
// "this" doesn't refer to our element!
$( this ).addClass( "active" );
});
});但是这里的 $( this ) 不再是预期之中的结果。为此,jQuery 提供了 .proxy() 方法,这是典型的代理模式体现。
$( "button" ).on( "click", function () {

    setTimeout( $.proxy( function () {
        // "this" now refers to our element as we wanted
        $( this ).addClass( "active" );
    }, this), 500);

    // the last "this" we're passing tells $.proxy() that our DOM element
    // is the value we want "this" to refer to.
});$( "button" ).on( "click", function () {
setTimeout( $.proxy( function () {
// "this" now refers to our element as we wanted
$( this ).addClass( "active" );
}, this), 500);
// the last "this" we're passing tells $.proxy() that our DOM element
// is the value we want "this" to refer to.
});来看一下 proxy 的实现:
// Bind a function to a context, optionally partially applying any
// arguments.
proxy: function( fn, context ) {
  if ( typeof context === "string" ) {
    var tmp = fn[ context ];
    context = fn;
    fn = tmp;
  }

  // Quick check to determine if target is callable, in the spec
  // this throws a TypeError, but we will just return undefined.
  if ( !jQuery.isFunction( fn ) ) {
    return undefined;
  }

  // Simulated bind
  var args = slice.call( arguments, 2 ),
    proxy = function() {
      return fn.apply( context, args.concat( slice.call( arguments ) ) );
    };

  // Set the guid of unique handler to the same of original handler, so it can be removed
  proxy.guid = fn.guid = fn.guid || proxy.guid || jQuery.guid++;

  return proxy;
}
// Bind a function to a context, optionally partially applying any
// arguments.
proxy: function( fn, context ) {
if ( typeof context === "string" ) {
var tmp = fn[ context ];
context = fn;
fn = tmp;
}
// Quick check to determine if target is callable, in the spec
// this throws a TypeError, but we will just return undefined.
if ( !jQuery.isFunction( fn ) ) {
return undefined;
}
// Simulated bind
var args = slice.call( arguments, 2 ),
proxy = function() {
return fn.apply( context, args.concat( slice.call( arguments ) ) );
};
// Set the guid of unique handler to the same of original handler, so it can be removed
proxy.guid = fn.guid = fn.guid || proxy.guid || jQuery.guid++;
return proxy;
}装饰者模式在前端中的应用
装饰者模式如同代理模式一样,如今 JavaScript 也已经原生能够很好地进行支持了。简单来说就是在不改变原对象的基础上,对其对象进行包装和拓展,使原对象能够应对更加复杂的需求。这就有一点像高阶函数,因此在前端开发中非常多见:
import React, { Component } from 'react'
import {connect} from 'react-redux'
class App extends Component {
 render() {
  //...
 }
}
export default connect(mapStateToProps,actionCreators)(App);
import React, { Component } from 'react'
import {connect} from 'react-redux'
class App extends Component {
render() {
//...
}
}
export default connect(mapStateToProps,actionCreators)(App);或者在 Ant design 中:
class CustomizedForm extends React.Component {}

CustomizedForm = Form.create({})(CustomizedForm)
class CustomizedForm extends React.Component {}
CustomizedForm = Form.create({})(CustomizedForm)当然 TypeScript 函数修饰符 @ 也是类似的。
借助装饰者模式,很容易衍生出 AOP 面向切面编程的概念:
Function.prototype.before = function(fn) {
  const self = this
  return function() {
    fn.apply(new(self), arguments)
    return self.apply(new(self), arguments)
  }
}

Function.prototype.after = function(fn) {
  const self = this
  return function() {
    self.apply(new(self), arguments)
    return fn.apply(new(self), arguments)
  }
}Function.prototype.before = function(fn) {
const self = this
return function() {
fn.apply(new(self), arguments)
return self.apply(new(self), arguments)
}
}
Function.prototype.after = function(fn) {
const self = this
return function() {
self.apply(new(self), arguments)
return fn.apply(new(self), arguments)
}
}其实面向切面编程和装饰者模式思想是完全一致的。典型场景就是对表单的验证,我们将把表单输入逻辑校验的 validata 函数融入到 before 逻辑当中:
Function.prototype.before = function( beforefn ) {
  const self = this
  return function(){
    if ( beforefn.apply( this, arguments ) === false ) return
    return self.apply( this, arguments )
  }
}


const validate = function(){
  // 表单验证逻辑
}

const formSubmit = function() {
  // 表达提交逻辑
  ajax( 'http:// xxx.com/login', param )
}

submitBtn.onclick = function() {
  formSubmit.before( validate )
}Function.prototype.before = function( beforefn ) {
const self = this
return function(){
if ( beforefn.apply( this, arguments ) === false ) return
return self.apply( this, arguments )
}
}
const validate = function(){
// 表单验证逻辑
}
const formSubmit = function() {
// 表达提交逻辑
ajax( 'http:// xxx.com/login', param )
}
submitBtn.onclick = function() {
formSubmit.before( validate )
}职责链模式在前端中的应用
顾名思义,职责链模式就是建立一个流程链条,一个请求从一端进入,并从一个职责根据需求,流转进入另一个对象,直到找到合适的处理程序。
听上去似乎有点“中间件”的意思,我们来看一个简单的应用:账户付款时绑定一个基本帐户类,它连接了多种付款方式:paypal 支付、比特币支付,并根据不同付款方式的金额额度和付款额,选择第一个合适的账户进行支付逻辑:
class Account {
    next(account) {
        this.successor = account
    }

    pay(amount) {
        if (this.canPay(amount)) {
            console.log(`Paid ${amount} using ${this.name}`)
        } else if (this.successor) {
            console.log(`Cannot pay using ${this.name}. Proceeding...`)
            this.successor.pay(amount)
        } else {
            console.log('None of the accounts have enough balance')
        }
    }

    canPay(amount) {
        return this.balance >= amount
    }
}

class Bank extends Account {
    constructor(balance) {
        super()
        this.name = 'bank'
        this.balance = balance
    }
}

class Paypal extends Account {
    constructor(balance) {
        super()
        this.name = 'Paypal'
        this.balance = balance
    }
}

class Bitcoin extends Account {
    constructor(balance) {
        super()
        this.name = 'bitcoin'
        this.balance = balance
    }
}
class Account {
next(account) {
this.successor = account
}
pay(amount) {
if (this.canPay(amount)) {
console.log(`Paid ${amount} using ${this.name}`)
} else if (this.successor) {
console.log(`Cannot pay using ${this.name}. Proceeding...`)
this.successor.pay(amount)
} else {
console.log('None of the accounts have enough balance')
}
}
canPay(amount) {
return this.balance >= amount
}
}
class Bank extends Account {
constructor(balance) {
super()
this.name = 'bank'
this.balance = balance
}
}
class Paypal extends Account {
constructor(balance) {
super()
this.name = 'Paypal'
this.balance = balance
}
}
class Bitcoin extends Account {
constructor(balance) {
super()
this.name = 'bitcoin'
this.balance = balance
}
}在使用时,我们先给三个账户充钱:
const bank = new Bank(100)          // Bank with balance 100
const paypal = new Paypal(200)      // Paypal with balance 200
const bitcoin = new Bitcoin(300)    // Bitcoin with balance 300
const bank = new Bank(100) // Bank with balance 100
const paypal = new Paypal(200) // Paypal with balance 200
const bitcoin = new Bitcoin(300) // Bitcoin with balance 300并按顺序优先调用银行付款、PayPal 付款、比特币付款:
bank.next(paypal)
paypal.next(bitcoin)bank.next(paypal)
paypal.next(bitcoin)最终付款行为:
bank.pay(250)bank.pay(250)输出:
Cannot pay using bank. Proceeding...
Cannot pay using Paypal. Proceeding...
Paid 250 using bitcoin
Cannot pay using bank. Proceeding...
Cannot pay using Paypal. Proceeding...
Paid 250 using bitcoin策略模式在前端中的应用
策略模式能够让开发者基于具体场景,来切换不同的算法或者策略。本身这个模式比较简单,但是有一个比较有意思的应用:V8 引擎在实现排序时,根据排序长度的不同,动态合理选用排序策略,达到尽可能的性能优化,例如代码:
const bubbleSort = target => {
    console.log('Sorting with bubble sort')
    // ...
    // ...
    return target
}

const quickSort = target => {
    console.log('Sorting with quick sort')
    // ...
    // ...
    return target
}

const sorter = target => {
    if(target.length > 5){
        return quickSort(target)
    } else {
        return bubbleSort(target)
    }
}
const bubbleSort = target => {
console.log('Sorting with bubble sort')
// ...
// ...
return target
}
const quickSort = target => {
console.log('Sorting with quick sort')
// ...
// ...
return target
}
const sorter = target => {
if(target.length > 5){
return quickSort(target)
} else {
return bubbleSort(target)
}
}在目标数组长度大于 5 时使用快排,否则使用冒泡排序。感兴趣的读者可以自行了解 V8 的实现,看看这个分界策落的阈值(这里的例子中使用了 5)是多少,以及思考为什么选取该阈值。
上述代码的使用:
const long = [1, 5, 4, 3, 2, 8]
const short = [1, 5, 4]

const result1 = sorter(long)
const result2 = sorter(short)
const long = [1, 5, 4, 3, 2, 8]
const short = [1, 5, 4]
const result1 = sorter(long)
const result2 = sorter(short)输出:
Sorting with quick sort
Sorting with bubble sort
Sorting with quick sort
Sorting with bubble sort由此看出:第一个部分是策略类,策略类封装了具体的算法,并负责具体的计算过程;第二个部分是环境类,这个环境类接受客户的请求,随后把请求委托给某一个策略类。另一个应用策略模式的例子是表单校验:
class Validator {
  constructor() {
    this.cache = []
  }

  add(dom, rule, errorMsg) {
    let array = rule.split(':')

    this.cache.push(function(){
      var strategy = array.shift()
      array.unshift(dom.value)
      array.push(errorMsg)

      return strategies[strategy].apply(dom, array)
    })
  }

  start() {
    for (let i = 0, validatorFunc; validatorFunc = this.cache[i++]; i < this.cache.length) {
      const msg = validatorFunc()
      if (msg) return msg
    }
  }
}

const strategies = {
    isNonEmpty: function(value, errorMsg) {
        if (value='') {
            return errorMsg
        }
    },
    minLength: function(value,length, errorMsg) {
        if (value.length<length) {
            return errorMsg
        }
    },
    isMobile: function(value, errorMsg) {
        if (!/^1[3|5|8][0-9]$/.test(value)) {
            return errorMsg
        }
    }
}

const validataFunc = function(){
    let validator = new Validator()
    validator.add(registerForm.userName, 'isNonEmpty', '用户名不能为空’)
    validator.add(registerForm.password, 'inLength:6' ,'密码长度不能少于6位')
    validator.add(registerForm.phoneNumber, 'isMobile', '手机号码格式不正确’)

    const  errorMsg = validator.start()
    return errorMsgs
}

const registerForm = document.getElementById("registerForm")
registerForm.onsubmit = function() {
    varerrorMsg = validataFunc()
    if (errorMsg) {
        alert(errorMsg)
        return false
    }
}
class Validator {
constructor() {
this.cache = []
}
add(dom, rule, errorMsg) {
let array = rule.split(':')
this.cache.push(function(){
var strategy = array.shift()
array.unshift(dom.value)
array.push(errorMsg)
return strategies[strategy].apply(dom, array)
})
}
start() {
for (let i = 0, validatorFunc; validatorFunc = this.cache[i++]; i < this.cache.length) {
const msg = validatorFunc()
if (msg) return msg
}
}
}
const strategies = {
isNonEmpty: function(value, errorMsg) {
if (value='') {
return errorMsg
}
},
minLength: function(value,length, errorMsg) {
if (value.length<length) {
return errorMsg
}
},
isMobile: function(value, errorMsg) {
if (!/^1[3|5|8][0-9]$/.test(value)) {
return errorMsg
}
}
}
const validataFunc = function(){
let validator = new Validator()
validator.add(registerForm.userName, 'isNonEmpty', '用户名不能为空’)
validator.add(registerForm.password, 'inLength:6' ,'密码长度不能少于6位')
validator.add(registerForm.phoneNumber, 'isMobile', '手机号码格式不正确’)
const errorMsg = validator.start()
return errorMsgs
}
const registerForm = document.getElementById("registerForm")
registerForm.onsubmit = function() {
varerrorMsg = validataFunc()
if (errorMsg) {
alert(errorMsg)
return false
}
}其中,validataFunc 是我们的环境类,而 Validator 和 strategies 构成我们的策略。
总结
这节课程讲解了:工厂模式、单例模式、建造者模式、外观模式、适配器模式、享元模式、代理模式、装饰者模式、职责链模式、策略模式等在前端中的实现和应用。同时,包括原型模式、观察者模式、迭代器模式在内,这些模式都非常贴近 JavaScript 原有语法,因此不再过多赘述。
实际上,设计模式很简单,我们应该做到的是需要应用时“胸中有数”,能够想到设计模式实现,而不需要一味死记硬背。